Arc Soft Portrait Photoshop Plugin
Hi CAFE Crew, here is a brand new tut for you all. This is an old favorite of mine. How to turn a photo into a pencil sketch in photoshop. This is actually really easy to do and it gets quite good results too. As usual, I’ll provide a few creative jump off points at the end for your own experimentation.
Main Info: Tutorial on how to change the low steering sensitivity in Need For Speed Most Wanted 2012 simply by changing the graphic settings. Other Info: Game: NFS MW 2012 Car: Ford GT My Facebook. 10 Tips To Make NFS Most Wanted 2012 Easier - Duration: 4:12. BojanV03 141,080 views.  Need for Speed: Most Wanted 2012 Maximum Performance Optimization / Low Specs Patch. Need for Speed: Most Wanted (2012) low 1024x768 Low / Off. This patch used in the video allows you to play NFS Most Wanted 2012 with low. Windows XP or later 128mb Graphics. NFS Most Wanted Low Settings Patch. This patch used in the video allows you to play NFS Most Wanted 2012 with low settings in any old computer in order to get the best performance.
1.
Start with a Photo that has some decent edge detail, here is one I got from Adobe Stock
2
Covert the photo to grayscale (Ctrl+Shift+D / Cmd+Shift+D)
3
When talking about portrait photoshop. ArcSoft Portrait+ provides a solution based around intuitive pre-defined styles for. Retouch Portrait.
Duplicate the layer by dragging into the new layer icon, or press Ctrl/Cmd+J
4
Invert the layer Cmd/Ctrl+I
5
Change to Linear Dodge blend mode and you should see a perfectly white image (Use Color Dodge for sharper edges)
6
Filter>Blur>Gaussian Blur
(You could actually use any filter, as long as it creates a difference between the 2 layers)
As you adjust the blur you will get a different result.
Here are some variations using Color Dodge, you will notice that Linear Dodge produces a softer result that Color Dodge. Try different blending Modes for different results.
Here is the result on a different image
Xtra-credit
Once you have your perfect pencil sketch, why not try adding some color for a nice variation.
In this first example, I added a solid color Fill adjustment layer. Change the blend mode to color, so only the color shows through. Adjust the opacity to suit your tastes.
Color Dodge result
Also try running a gradient through a new blank layer at the top and change that to color blend mode.
As you can see, the effect itself is quite simple and there are a number of variations that you can try to get very different looking results. Add a comment at let me know how you are using this effect.
Thanks for checking out this tutorial. If you like these kinds of effects, check out my Photographic Effects video course, it’s 27 different effects like this and its only $7
See you next week with another new tutorial!
Colin
Premium content, celebrating the launch of PhotoshopCAFE online Academy
We are excited to now offer our premium content as streaming video! We are committed to making our content available to you however you want it. To celebrate, we are offering Photoshop Secrets: Photographic Effects by Colin Smith, away for a measly $7
This is one of out premium training courses, it’s $49.99 but for a very short time, you can get it for $7! No strings attached, login and watch right now!(Grab it while you can).
CS6 Superguide
All the CS6 information and more is available as a PDF magazine called the CS6 Superguide. If you’re on our list, you will receive it free by email as soon as it’s available. If not, sign up now and get the CS6 Superguide for free. Or click the image below.
Auto Retoucher for Portraits
- Batch-process dozens of photos in minutes
- Achieve amazing results - all in a few clicks
- Ideal for professional photo studios, portrait studios and photo labs
- No training needed
- Save time, save costs
Batch process and auto-retouch
- Easily import a large amount of photos with a single click.
- Supports JPG/TIFF formats. The maximum supported resolution is 8000*8000 and the minimum is 480*480
- Retouch portraits quickly and automatically with desired effects
- Batch process and export all the photos in minutes
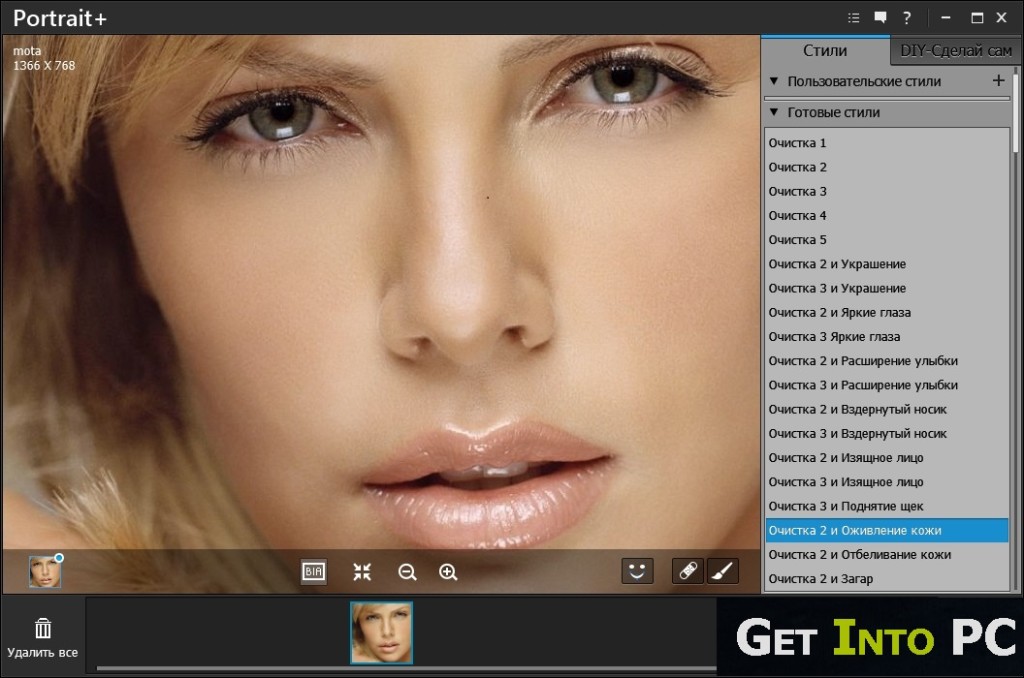
Automatic face-detection
- Able to detect up to 20 faces in one photo
- Precisely pinpoint facial features including nose, mouth, ears, eyes and eyebrows
Up to 20 pre-set 'Cleanse' and 'Makeup' styles
- Stunning enhancements achieved with natural-looking results
- Apply multiple styles to a single photo
- Pre-set styles such as Cleanse light, Cleanse & Beautify, Cleanse & Slim Face
Tips: Use Photo+ to optimize your photo selection
- Photo+ is a photo viewer that enables you to sort through your best photos
- After retouching them in portrait+ you can use Photo+ to compare and select your favorites
Requirements
• Support for Photoshop 7.0, CS, CS2, CS3, CS4, CS5, CS6, CC and Photoshop Elements 10, 11, 12
OS: Windows XP/Vista/7/8
Home Page - http://www.arcsoft.com
Download from Media1Fire